
2019年12月6日ごろ、GTMのコミュニティテンプレートギャラリーへ新たに「Elapsed Time」変数テンプレートが掲載されました。
これはざっくりと言うとページ表示からの経過時間を取得する変数テンプレートで、簡単に使い方などをご紹介しますね。
なお今回もグローバルに世界中からアクセスされる可能性があるため、本記事についても日本語と英語を併記させていただいております。
前半は日本語文章、後半は英語文章という構成になっておりますが、中身はなるべく同じものとしています。
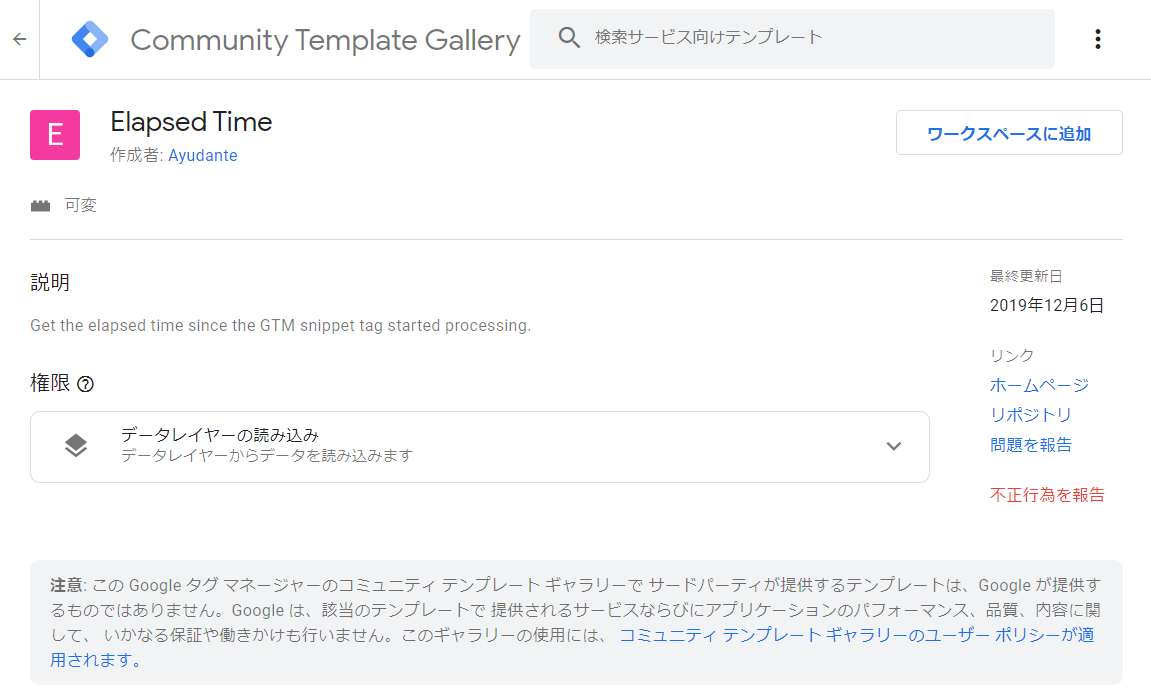
Elapsed Timeはページ表示からの経過時間を取得する変数テンプレート
Elapsed Timeテンプレートで登録した変数が取得する値は、簡潔に言うとページ表示からの経過時間です。
- Point
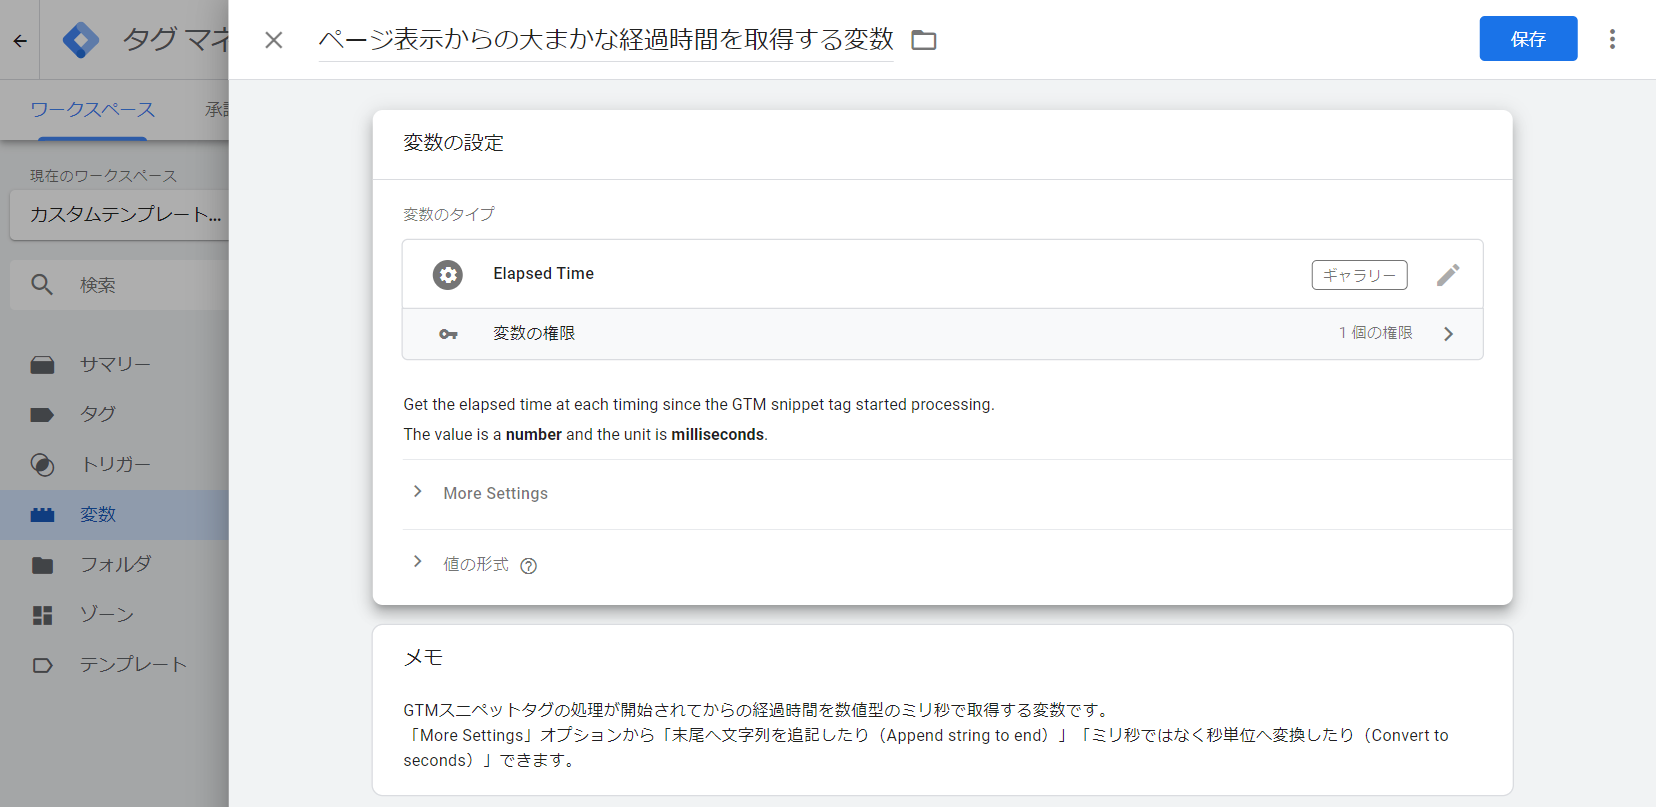
- ページでGTMスニペットタグの処理が開始されてからの経過時間を、ミリ秒単位の数値で取得する変数。
- オプション欄の設定で、末尾へ文字列を追記したり(More Settings > Append string to end)、秒単位へ変換したり(More Settings > Convert to seconds)もできます。
- 取得されるのは「ページ内での」経過時間です。サイト流入を起点とするセッションの経過時間ではありません。
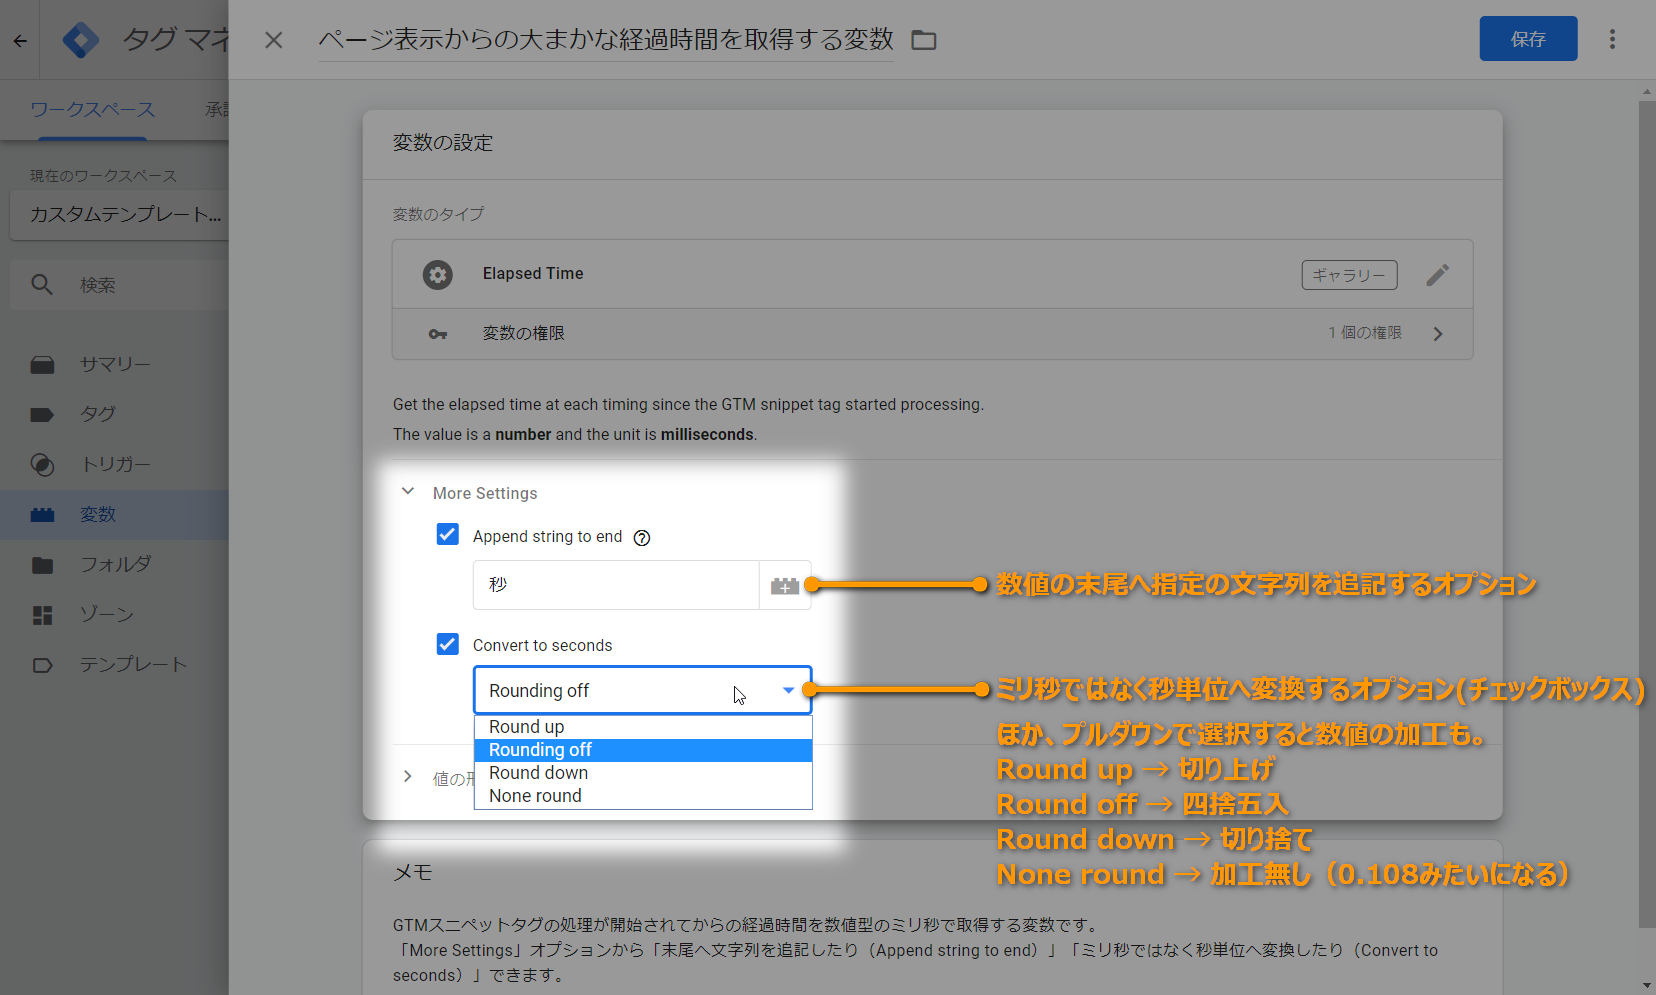
また「Convert to seconds」へチェックを入れると、ミリ秒(1/1000秒)単位から秒単位へ変換ができるほか、小数点以下を切り上げ(Round up)/四捨五入(Round off)/切り捨て(Round down)なども可能です。
なお厳密には、取得されるのは「GTMスニペットタグの処理開始からの経過時間」となります。
GTMスニペットタグがページ内の上部へ設置されていれば「ページ表示からの経過時間」により近づきますが、ページ内の下部などへ設置されている場合は誤差が大きくなってきますので、その点はご注意ください。
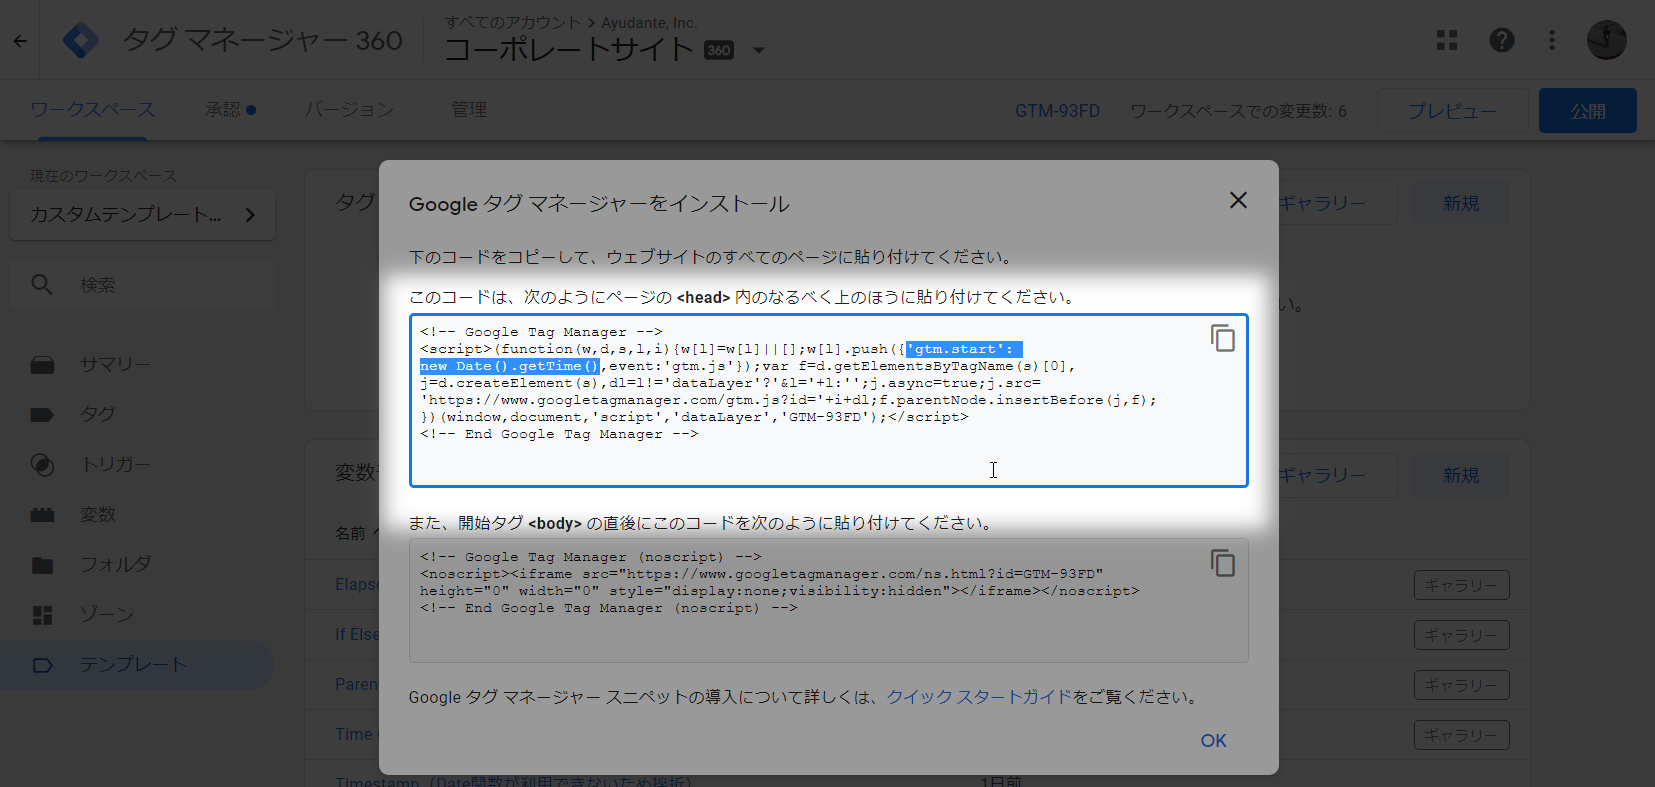
そのため、厳密な「ページ表示からの経過時間」にはなりえませんので、目安の数値としてご利用ください。
インポート方法
コミュニティテンプレートギャラリーへ掲載されていますので、インポートはとても簡単です。
GTMの管理画面内から、常に最新のテンプレートをインポートできます。
- Elapsed Timeを使用したいGTMコンテナを開く
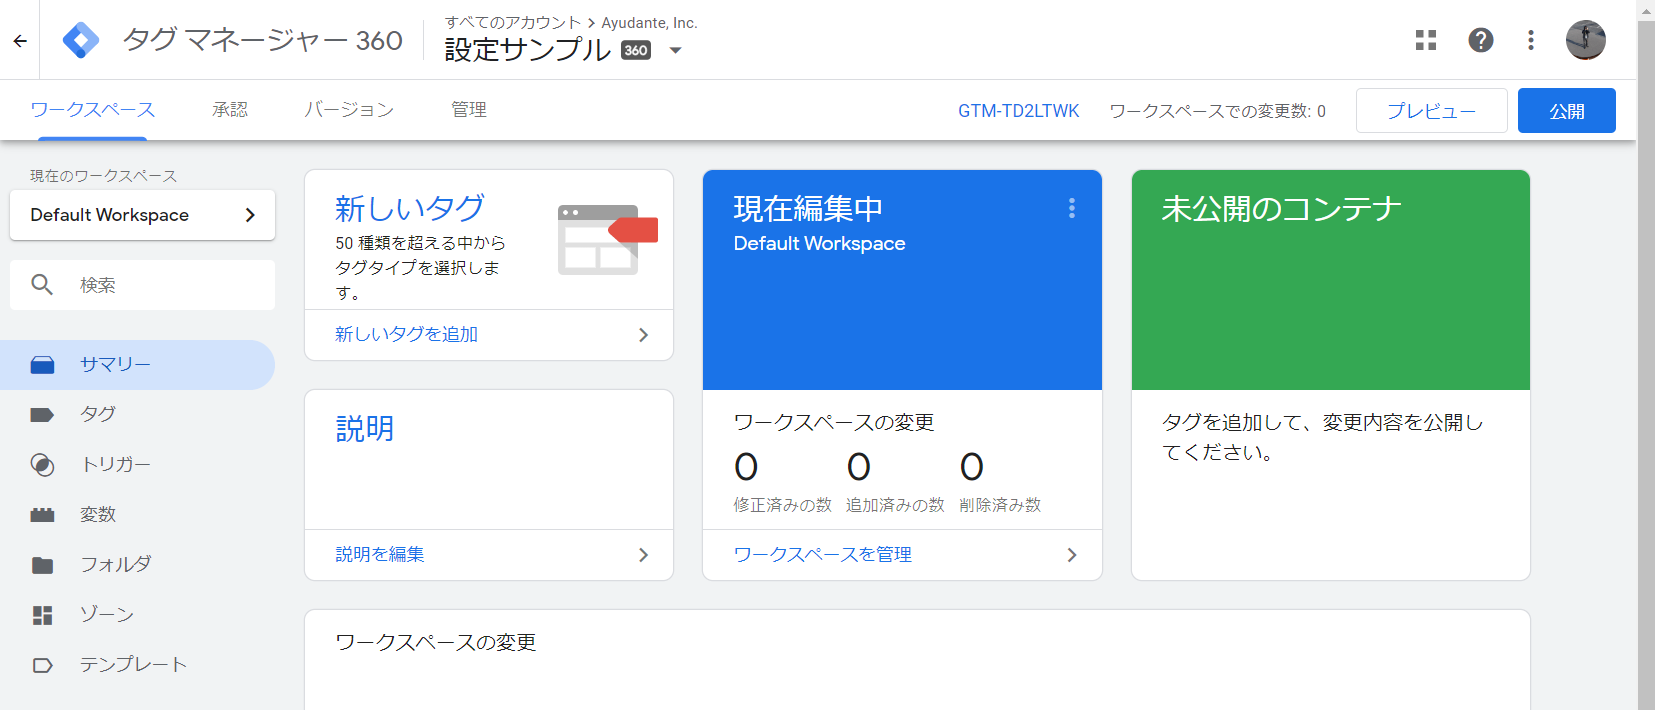
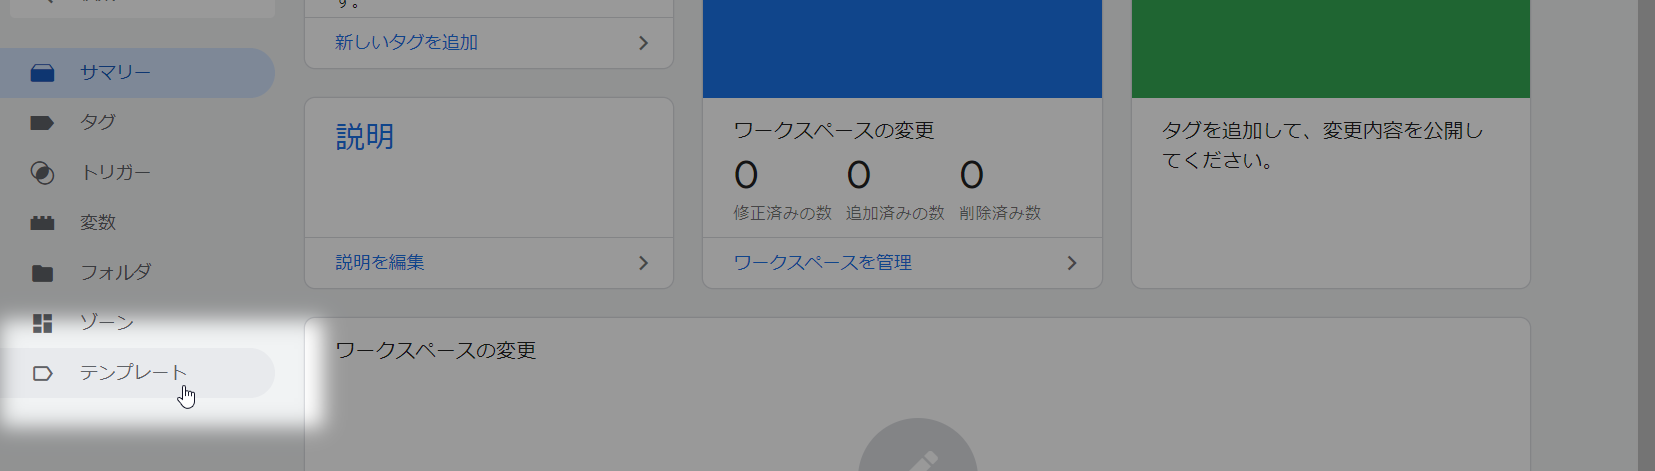
- 左メニューの「テンプレート」からテンプレートの一覧画面を開く
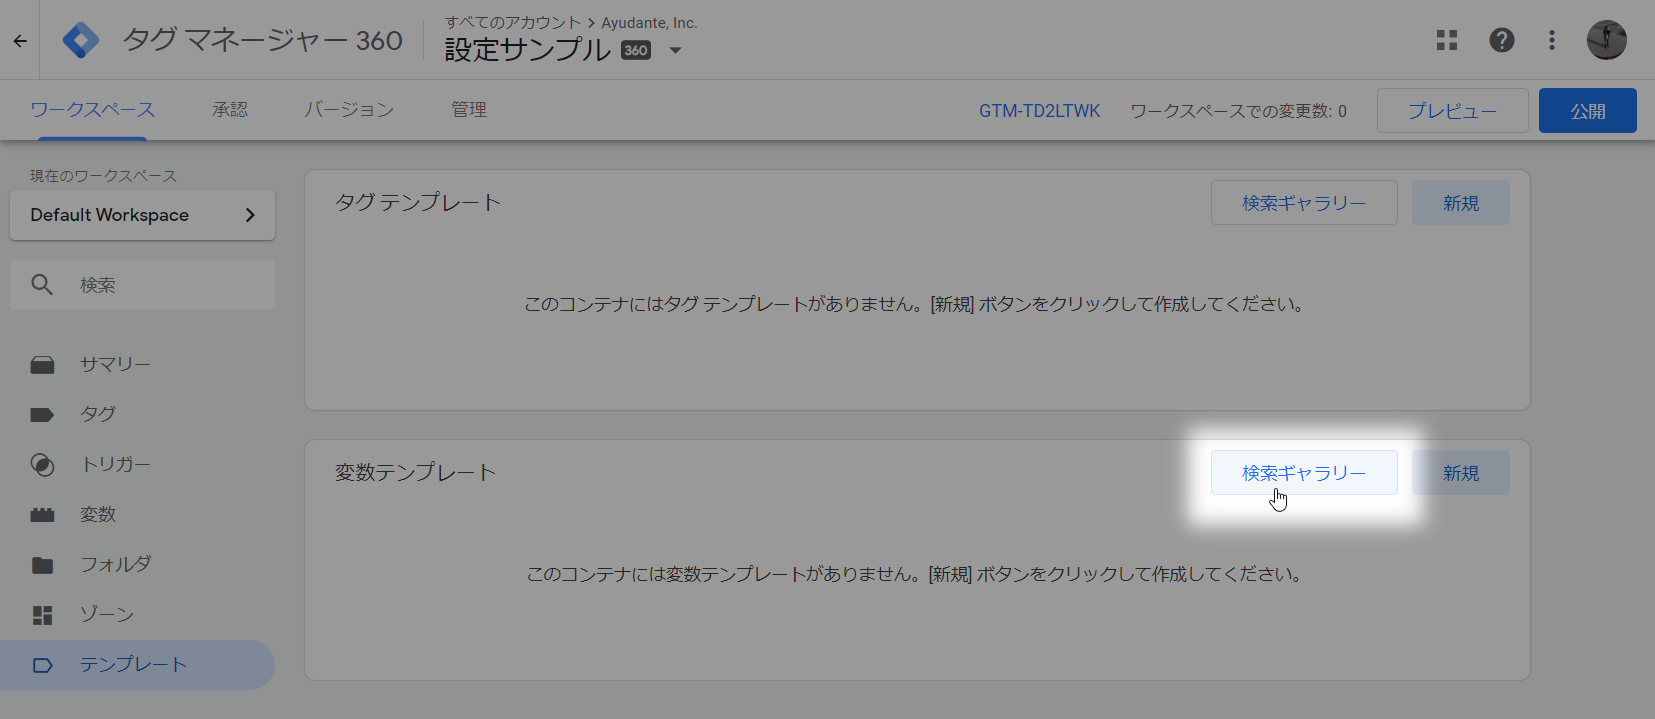
- 「変数テンプレート」ブロックの右上にある「検索ギャラリー」ボタンをクリック
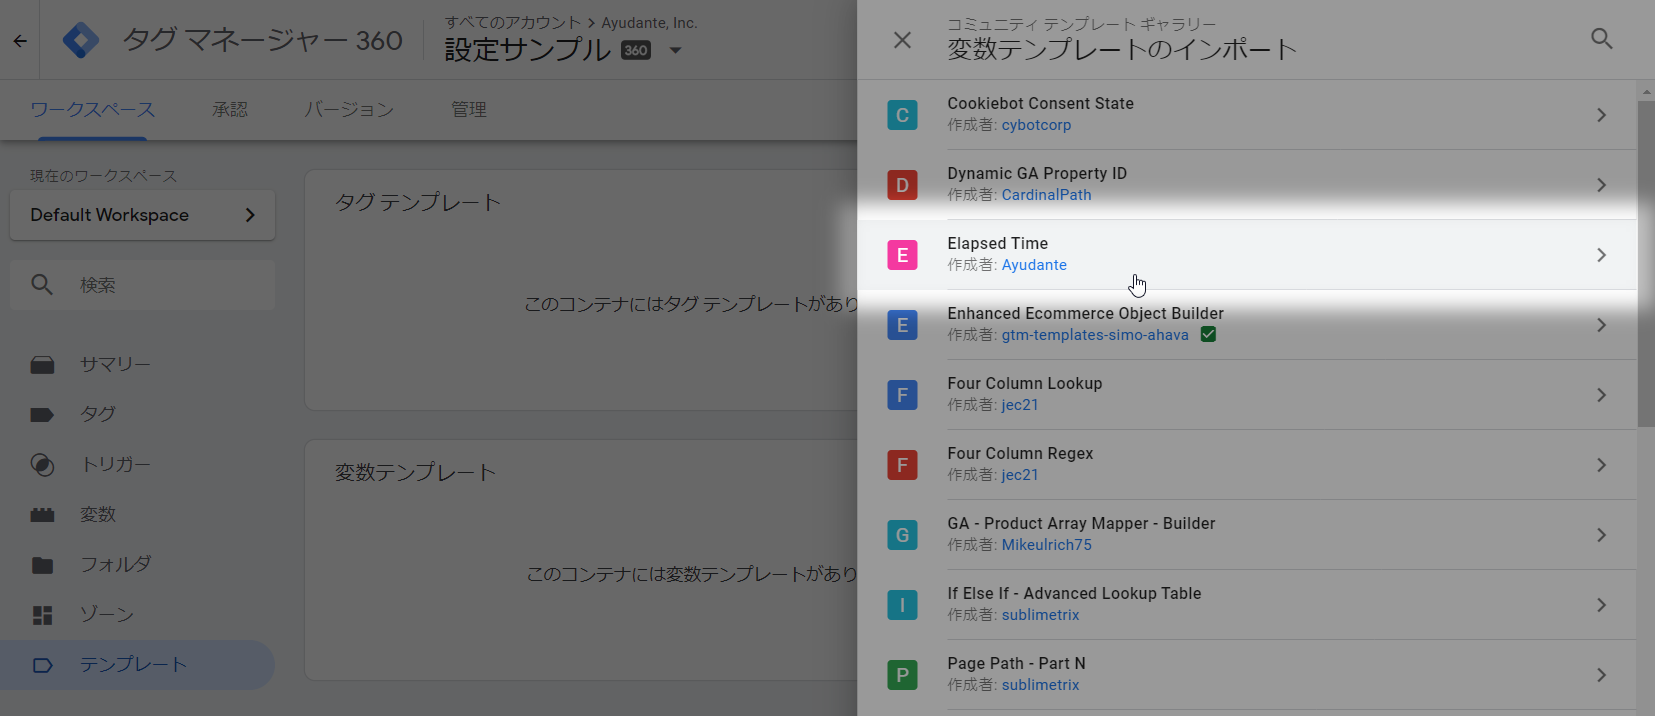
- 「Elapsed Time」を探し出してクリック
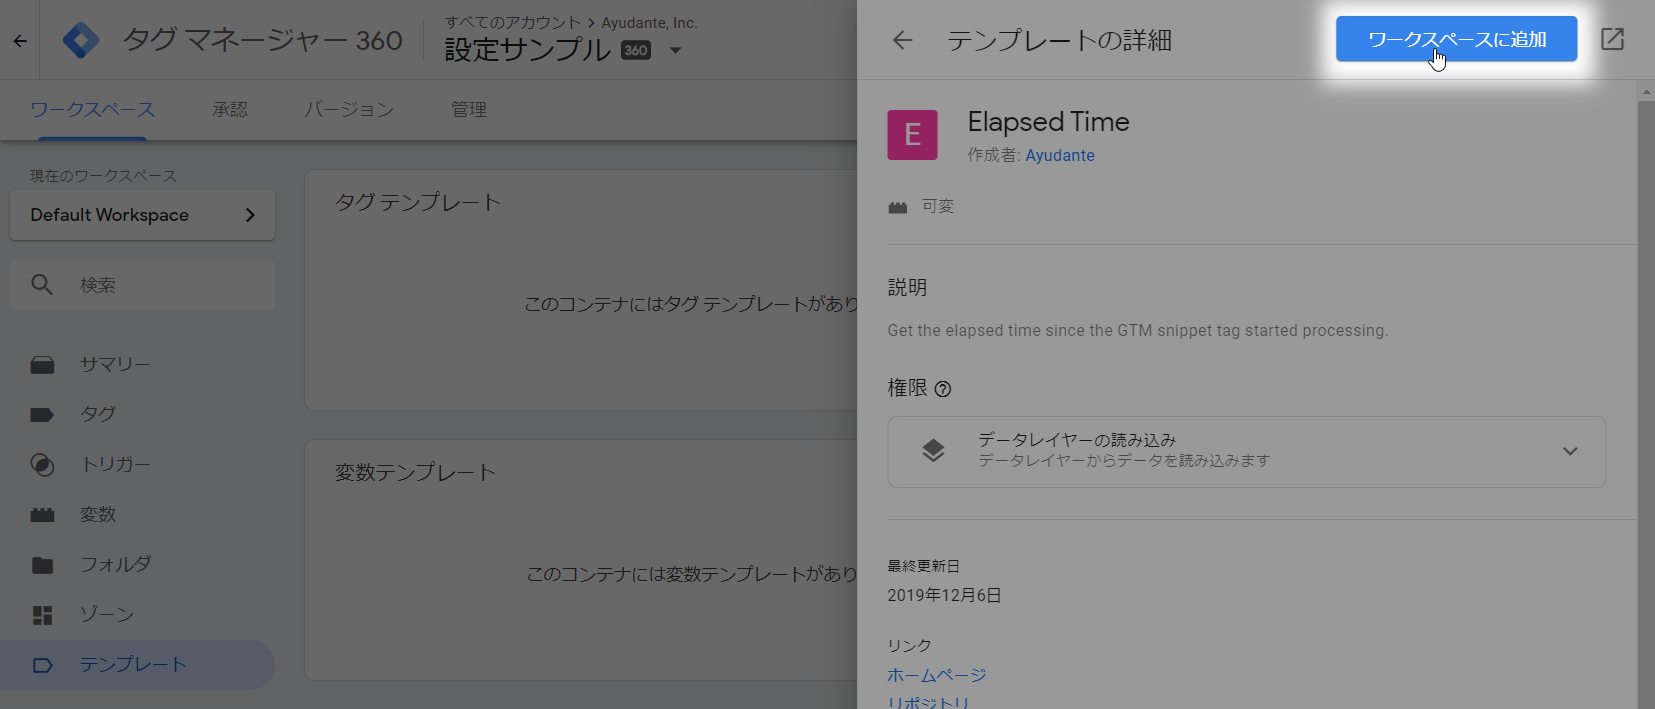
- テンプレートの詳細が表示されるので、右上の「ワークスペースに追加」ボタンをクリック
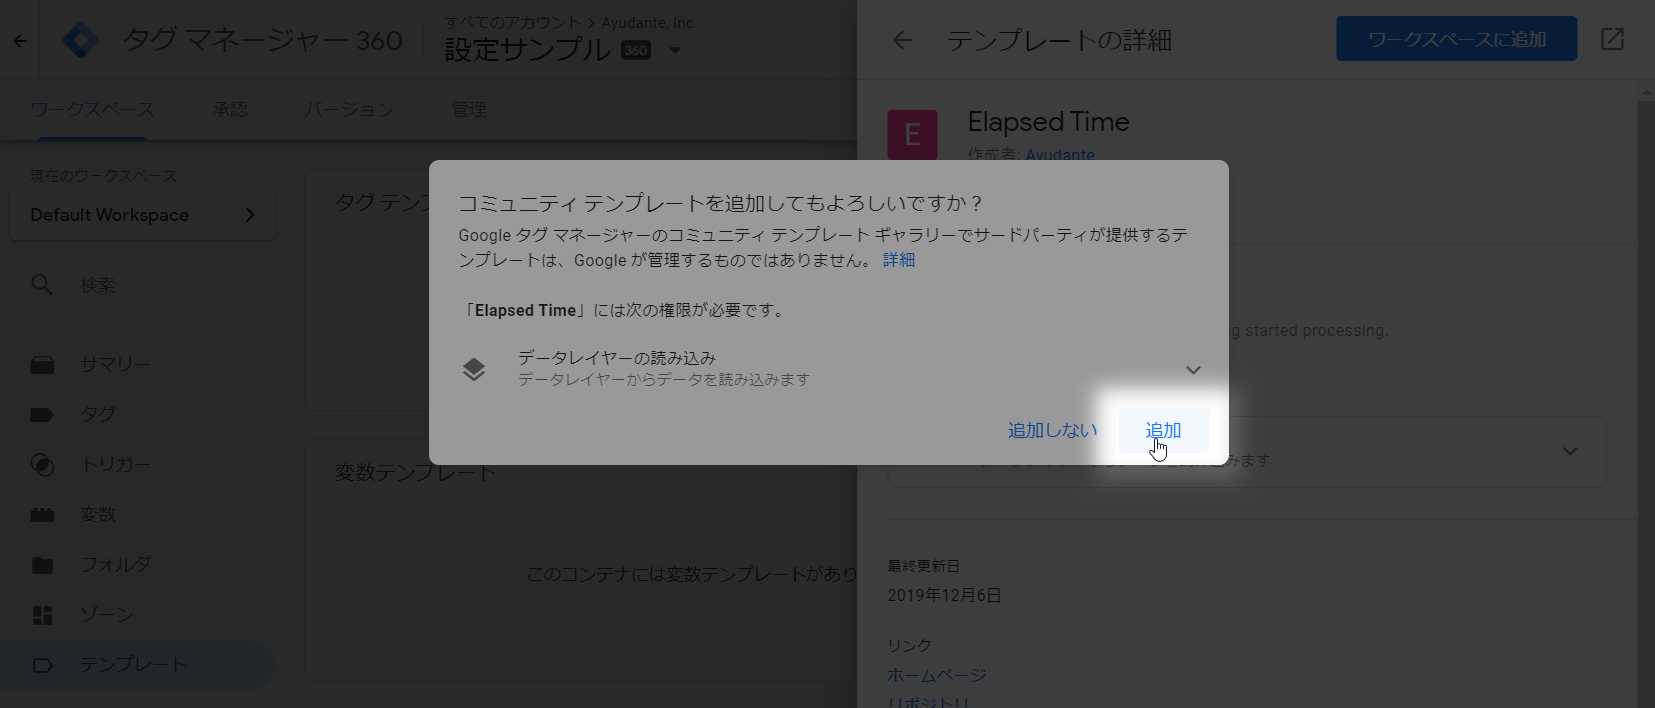
- 確認アラートが出るので、右下の「追加」ボタンをクリック
- 完了(バージョン作成すれば他ワークスペースでも利用可能に)
使用例:GAでのユーザーアクションの計測時に経過時間を含める
主だった使い道としては、ボタンクリックやフォームの送信、ページスクロールなどのGA計測が考えられます。
それらのイベント計測時に、ラベルやカスタムディメンション、またはイベント値などとして含めるのがオススメです。
例えば、商品詳細で「カートへ追加」ボタンがクリックされた際のイベント計測へ、カスタムディメンションで追加したとします。

そこで計測された経過時間は「カートへ追加するかどうか悩んだ時間」と解釈できるかもしれません。
さらに得たデータを、カートへの投入率が高い商品と低い商品で比較して違いがあるのかないのか調べたり、各ページの掲載内容をPDCA回して改善を図ったり、といった使い道が考えられます。
- カテゴリ:ボタンクリック
- アクション:カート追加
- ラベル:{{商品名}}
- カスタムディメンション(ヒットスコープ):{{Elapsed Time}}
例えば、読み物ページで記事本文末尾が表示されたタイミングでのイベント計測へ、ラベルで追加したとします。
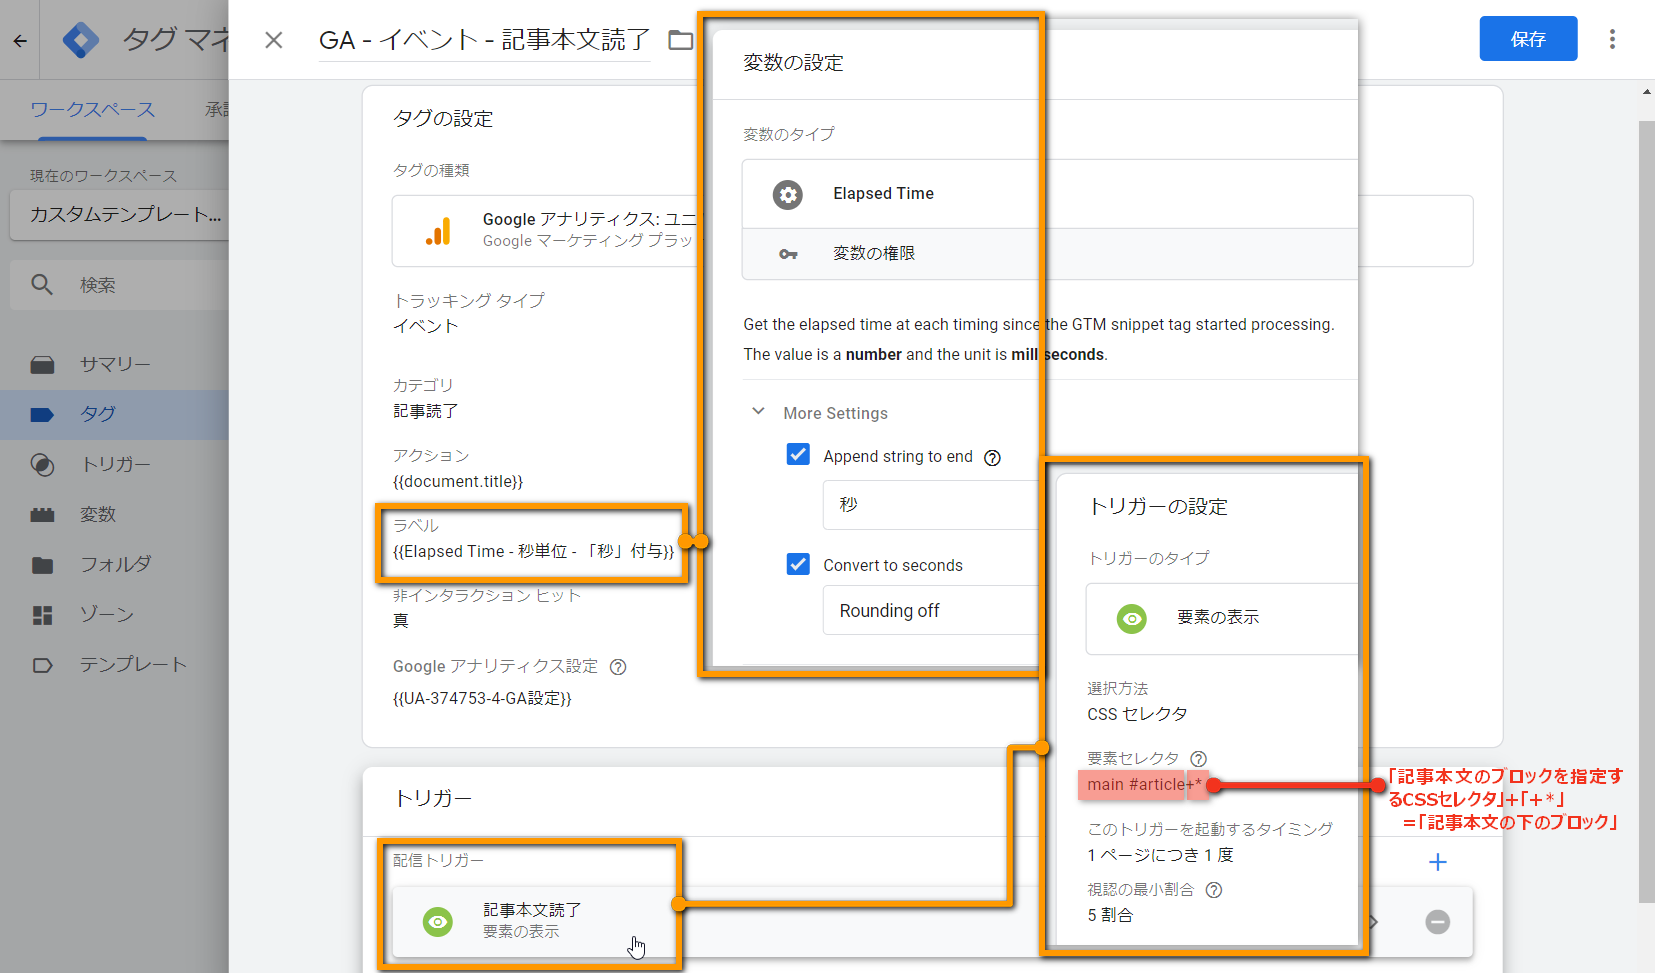
そうすると「その記事を読み終えるのにかかった時間」が見られるようになります。
さらに得たデータを、記事毎に平均読了時間を手入力で算出してみて各記事で比較する、といった使い方もできるでしょうし、読了する人の割合が大きい記事と小さい記事で比較して「読まれている時間」に差がないか調査してみる、なども面白いかもしれません。
- カテゴリ:記事読了
- アクション:{{記事タイトル}}
- ラベル:{{Elapsed Time}}
また、GAの計測データへ含めるということは、Google広告で配信対象として使うユーザーリストでも使える、ということです。
例えば計測内容によっては、「30秒以上かかってから商品をカートへ追加して」「でも結局カートから先(購入フロー)へは進まなかった」みたいな条件を作れたりするかもしれませんね。
進んだ使い方
Elapsed Timeはオプションの設定欄も少なく、機能もシンプルな変数テンプレートです。
ただこれ単体では少々使いにくいケースが出てくるかもしれません。
そういった時は、コミュニティテンプレートギャラリーへ掲載されている他のテンプレートを利用すると、より柔軟に活用できます。
数値の粒度をざっくりとしたものへまとめる
Elapsed Timeテンプレートの変数で得た数値をそのまま計測値としてセットしたら、GAのレポートで見たときに数値が1違うだけで別行になるため、正直見辛かった。
というケースも(高確率で)あるかと思います。
そういった場合は「1刻み」ではなく、「5刻み」や「10刻み」など、単位を変えて複数の数値をまとめてしまうのがオススメです。
これには以前の変数テンプレートの紹介記事で取り上げたIf Else If – Advanced Lookup Tableテンプレートが便利です。
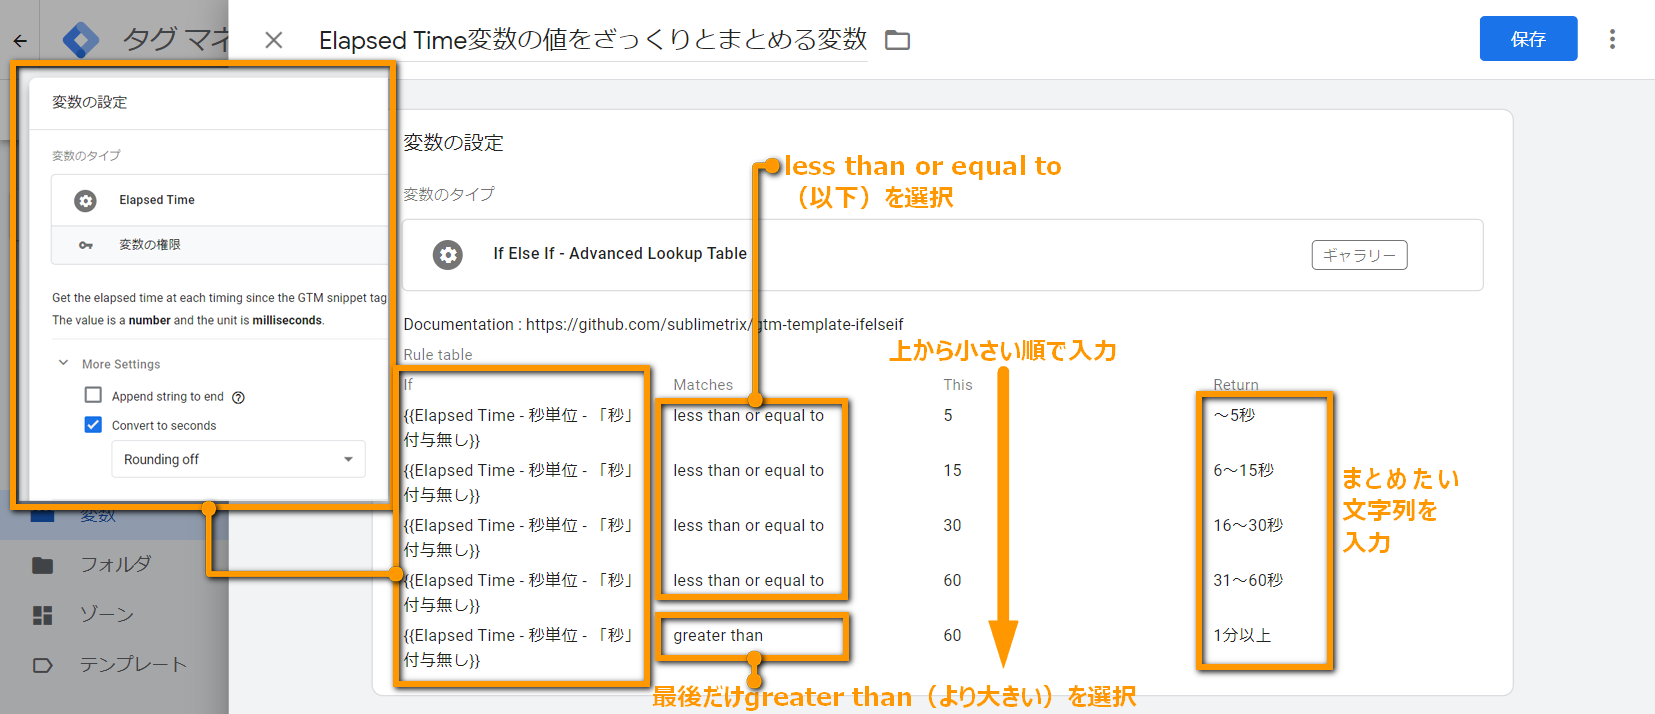
If Else If – Advanced Lookup Tableテンプレートの変数は条件として数値を比較することができますので、上図のように「less than or equal to(以下)」にした行を並べれば0~5→「~5」、6~10→「6~10」のように簡単にまとめられるようになります。
なお複数行が合致した場合は「上の行が優先」となりますので、「less than or equal to(以下)」でまとめる場合は必ず小さい数値を上に、大きい数値を下に、設定するようご注意ください。
ミリ秒を秒以外の単位へ変換する
Elapsed Timeテンプレートの変数はデフォルトではミリ秒(1/1000秒)単位、またはオプション(More Settings > Convert to seconds)で秒単位で取得ができます。
一般的に1つのページが表示され続ける時間はそこまで長くなるケースは稀だとは思いますが、例えばSPAのように「長時間同じページが開かれ続ける」場合にはオプションで秒単位にしたとしても少々利用し辛く、分単位にしたい、といった場面も出てくるかもしれません。
そういった「時間の単位を変換したい」場合は、Time Converterテンプレートが利用できます。
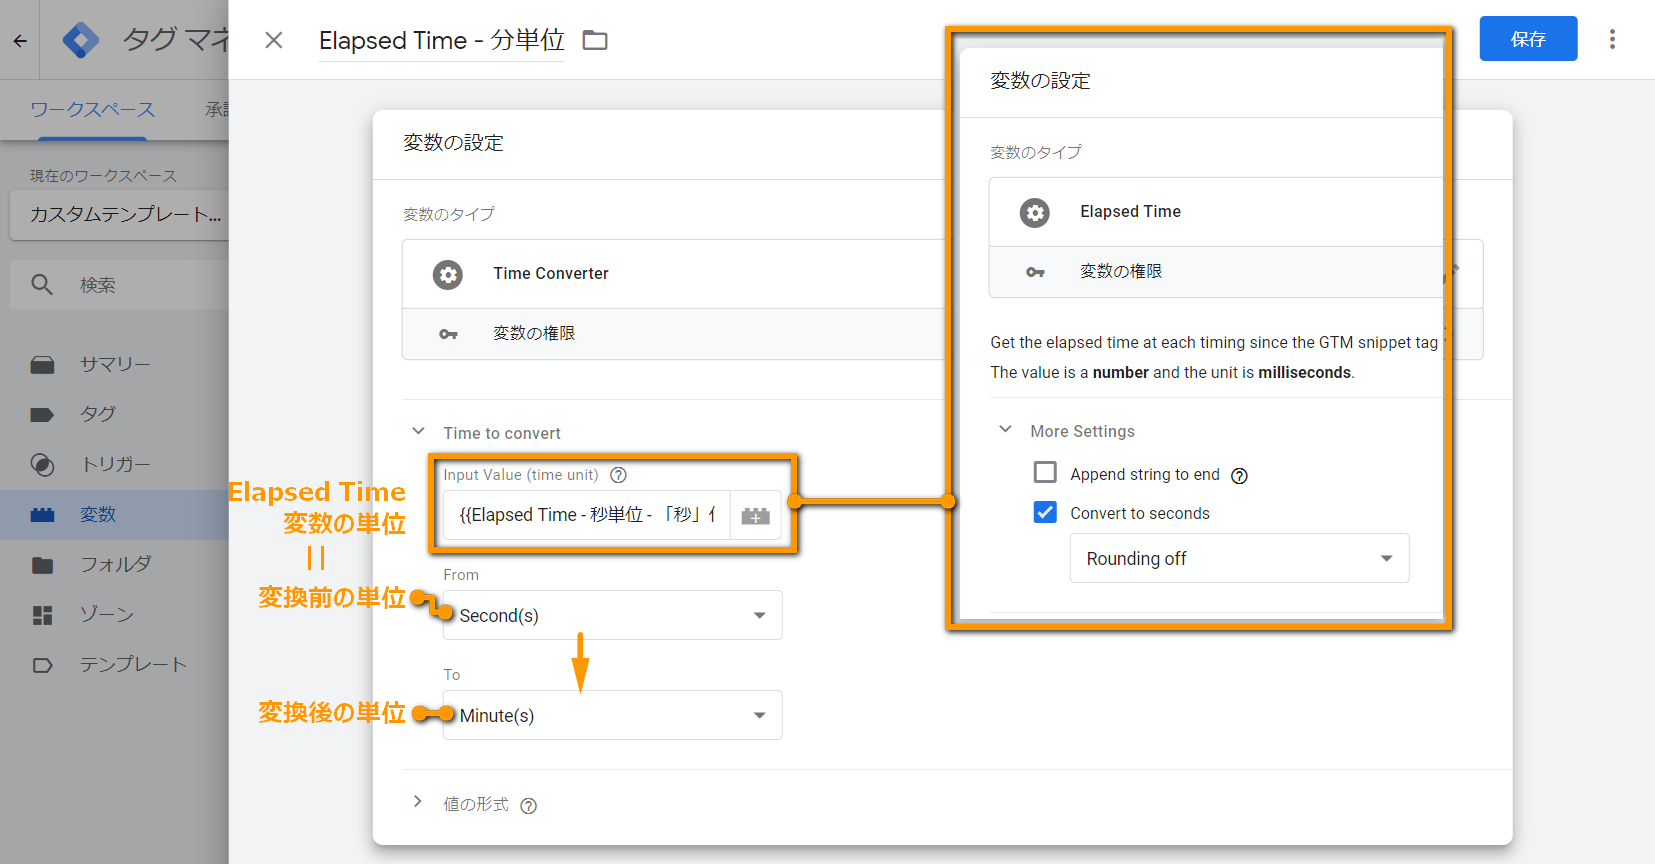
Time Converterテンプレートは以前の変数テンプレートの紹介記事の後にギャラリーへ追加された変数テンプレートで、「Input Value(値)」および「From(単位)」で指定した数値データを、「To(変換後の単位)」で指定した時間単位へ計算して変換してくれるものです。
これを使うと、簡単にミリ秒(や秒)を分単位(Minute(s))へ変換できます。
このように、テンプレート単体だけではなく、テンプレートとテンプレートを組み合わせることでより快適に使えるようになるのです。
今回ご紹介した「Elapsed Time」テンプレートは、「Parent Element Variable」テンプレートと「Trim Query」テンプレートに続く、3つ目の弊社製テンプレートとなります。
こうしていくつかのテンプレートをギャラリーへ申請して掲載して感じたのは「自分(たち)が使う用としてだけ考えても、同じものを簡単にコピーできるし、メンテナンスなどを一元化できるし、地味に便利だなぁ」ということです。当然、ほかの人へ対しても便利なものを提供できてハッピーになるので、「秘蔵の自分用テンプレート」みたいなものをお持ちの方もぜひギャラリーへの申請をご検討いただけるとよりハッピーです。
For English
On December 6, 2019, a new “Elapsed Time” variable template was posted to the GTM community template gallery.
Roughly speaking, this is a variable template that get the elapsed time from the page display.
This article is written in both Japanese and English because it may be accessed globally.
The first half consists of Japanese sentences and the second half consists of English sentences, but the content is as similar as possible.
- “Elapsed time” is a variable template that gets the elapsed time from the page display
- Import method
- Example usage: Include elapsed time when measuring user actions in GA
- Advanced usage
“Elapsed time” is a variable template that gets the elapsed time from the page display
Simply put, the value obtained by the variable registered in the “Elapsed Time” template is the elapsed time from the page display.
- Point
- A variable that retrieves the number of milliseconds units since GTM snippet tag processing started on the page.
- You can also set an optional field to add a string to the end or convert it to seconds.
- What is acquired is the elapsed time “after page display”. It is not the elapsed time of the session starting from the inflow of the site.
When [Convert to Seconds] is turned on, you can convert from millisecond (1/1000 second) units to second units, rounding up / down / rounding down the decimal point.
Strictly speaking, what is acquired is the “elapsed time since the start of GTM snippet tag processing”.
If the GTM snippet tag is installed at the top of the page, it will be closer to the “elapsed time from page display”, but if it is installed at the bottom of the page, the difference in the numbers will be large. Please be careful.
Therefore, it is not an accurate “elapsed time from page display”, so use it as a guideline value.
Import method
Importing is very easy because it is posted in the community template gallery.
You can always import the latest template from the GTM management screen.
- Open the GTM container that uses the Elapsed Time.
- Open the template list screen from “Templates” in the left menu.
- Click the “Search Gallery” button in the upper right corner of the Variable Template block.
- Find and click “Elapsed Time”.
- The details of the template will be displayed, so click the “Add to workspace” button on the top right
- A confirmation alert will be displayed. Click the “Add” button at the bottom right.
- Done (Create a version and use it in other workspaces)
Example usage: Include elapsed time when measuring user actions in GA
The main application is GA measurement such as button click, form submission, page scrolling and so on.
When measuring these events, it is recommended that you include them as labels, custom dimensions, or event values.
For example, suppose you add a custom dimension to an event measurement when you click the Add to Cart button in the product details.
The measured elapsed time may then be interpreted as “time to consider adding to the cart”.
In addition, you can compare the retrieved data with products with high and low input rates in the cart to see if there is a difference, or enable PDCA to improve the content of each page.
- Category:Button Click
- Action:Add Cart
- Label:{{Product Name}}
- Custom Dimention(scope:hit):{{Elapsed Time}}
For example, suppose you add a label to an event measurement when the end of article text appears on a reading page.
Then, you can see “Time taken to finish reading the article”.
You can also manually calculate the average read completion time for each article, compare each article, and use the retrieved data compared to articles with a high percentage of people reading in small articles. It may be interesting to see if there is a difference in “read time”.
- Category:Reading Complete
- Action:{{Article Title}}
- Label:{{Elapsed Time}}
In addition, inclusion in GA measurement data means that it can also be used in user lists used for delivery in Google ads.
For example, depending on the measurement content, you may be able to create conditions such as “Add product to cart after 30 seconds” and “Not moved from cart (purchase flow)”.
Advanced usage
“Elapsed time” is a variable template with several options and simple functions.
However, this may be a little difficult to use.
In such cases, you can use other templates posted in the community template gallery for added flexibility.
Summarize numerical granularity
If you set the numerical value obtained with the variable of the “Elapsed time” template as the measured value as it is, it will be displayed on a separate line if the numerical value is different, making it difficult to see the report.
I think there are cases.
In such cases, instead of using “1 step”, it is recommended to collect multiple numbers by changing units such as “5 steps” and “10 steps”.
Use the “If Else If-Advanced Lookup Table” template from the article introducing past variable templates.
Since the variables in the “If Else If-Advanced Lookup Table” template can compare numerical values as conditions, if you line up the rows as “below” as above, 0-5 → “-5”, 6-10 → “6- 10 ”can be easily summarized.
If more than one line matches, the upper line takes precedence, so when summarizing with “less than or equal to”, make the upper number smaller and the lower number larger. Please be careful.
Convert milliseconds to units other than seconds
Elapsed time template variables can be retrieved by default in milliseconds (1/1000 second) or optionally in seconds.
In general, I think that it is rare that a page is displayed for a long time, but it is difficult to use it for a few seconds in an optional second, for example, when the same page is open for a long time like SPA. In this case, it is recommended to convert the units to minutes.
For “convert time”, you can use the “Time Conveter” template.
The “Time Converter” template is a variable template that is added to the gallery. The numerical data specified in “Input value” and “From (unit)” is calculated and converted to the time unit specified in “To (unit after conversion)”.
This makes it easy to convert milliseconds (or seconds) to minutes.
In this way, you can use more comfortably by combining not only templates but also templates.
The “Elapsed Time” template introduced here is the third template created after the “Parent Element Variable” and “Trim Query” templates.
I posted some templates in the gallery and felt that “Even if you’re just thinking about how to use it, you can easily copy the same and centralize maintenance.” Naturally, you are willing to offer something useful to others, so if you have something like “Treasure My Own Template”, consider applying for a gallery.