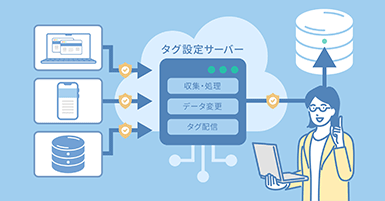
In today’s data-driven world, managing and transforming vast amounts of data efficiently, in a scalable manner is crucial for businesses to gain actionable insights. As organizations increasingly rely on cloud-based solutions, the need for streamlined data pipelines has never been more apparent. Google Cloud’s Dataform emerges as a powerful tool within this landscape, providing a structured framework for managing SQL-based workflows in BigQuery.
Positioned in-between raw data ingestion and final analysis / BI reporting, Dataform simplifies the complexities of data transformation, ensuring accuracy, scalability, and collaboration across data teams. This blog post explores how Dataform fits into modern data pipelines and addresses the challenges it seeks to solve.
1. Why do we need it ?
2. Getting started: setup & implementation
2.1 Create a Repository
2.2 Create a Workspace
2.3 Declare Data Source(s)
2.4 Defining transformations (creating BQ tables/views)
2.5 Executing the Transformation
2.6 Completion and Commit
3. Conclusion
1. Why do we need it ?
Few key reasons that necessitate Dataform when working with data pipelines.
Managing Complex SQL Scripts: As data pipelines grow, SQL scripts become harder to manage, leading to potential errors and inefficiencies. Dataform organizes SQL workflows into modular SQLX files, making complex transformations easier to manage, update, and scale.
Orchestrating Dependencies Between Data Jobs: Managing dependencies manually can lead to errors and incomplete data processing. Dataform automates dependency management by allowing users to define explicit dependencies between SQLX files, ensuring a smooth and accurate execution order.For ex. you can graphically view the full data lineage:

Ensuring Data Quality: Ensuring consistent data quality across large datasets is challenging and prone to manual errors. Dataform integrates built-in testing within the workflow, automating data validation and maintaining high-quality standards throughout the transformation process.
Version Control and Collaboration: Collaboration on SQL scripts can lead to conflicts and inconsistencies without proper version control. Dataform’s integration with Git enables seamless version tracking, collaboration, and rollback capabilities, ensuring stability and team efficiency.
2. Getting started: setup & implementation
This involves several steps, and we break down the whole process into manageable tasks, ensuring a smooth transition from initial setup to final deployment.
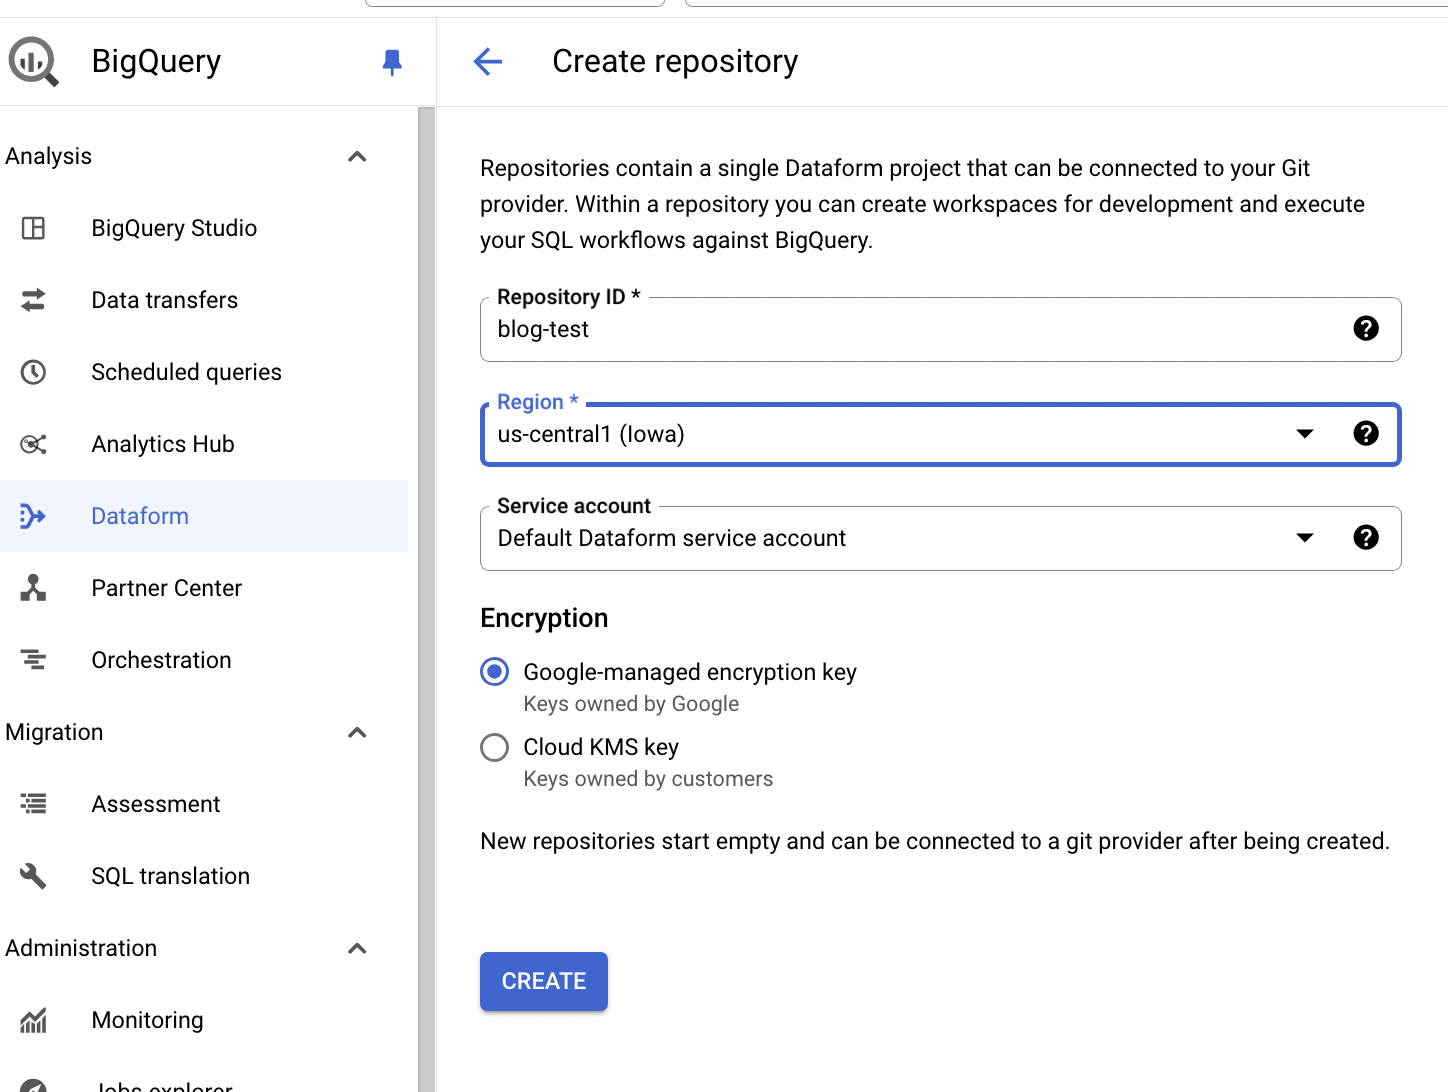
2.1 Create a Repository:
The very first step in setting up Dataform is creating a repository. This repository will serve as the version control system for your Dataform project, allowing you to track changes, collaborate with team members, and manage different versions of your data transformation code.
Go to Dataform page https://console.cloud.google.com/bigquery/dataform (you might need to Enable Datform API if it’s not already enabled in the project) → click CREATE REPOSITORY
Provide Repository ID and Region, and click CREATE
By default, the repo is stored and version controlled with-in Google Cloud, it is also possible to link this repo to connect with remote git repo (for ex. GitHub, GitLab, Bitbucket etc.) but this time we mainly discuss basics stuff.
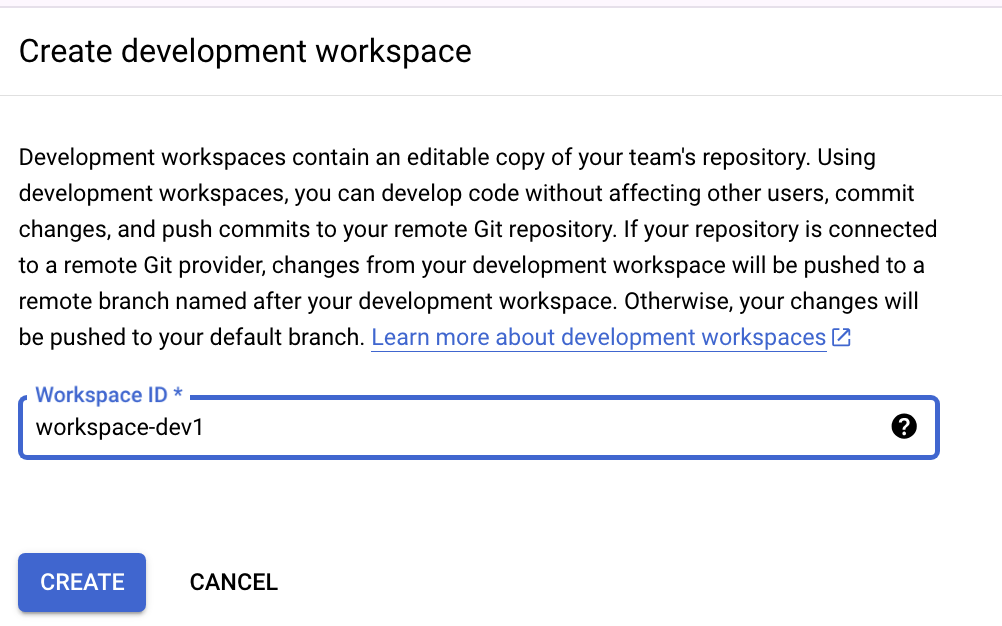
2.2 Create a Workspace:
A workspace in Dataform is where you define your project structure and organize your SQL scripts. This is where you’ll create the logical separation of different components of your data pipeline.
Go to the newly created repository we created in previous step —> click CREATE DEVELOPMENT WORKSPACE
Provide Workspace ID, and click CREATE
Once the Workspace is created, this is what you will see inside that → click INITIALIZE WORKSPACE

Once the new workspace is initialized, this is what you will see:
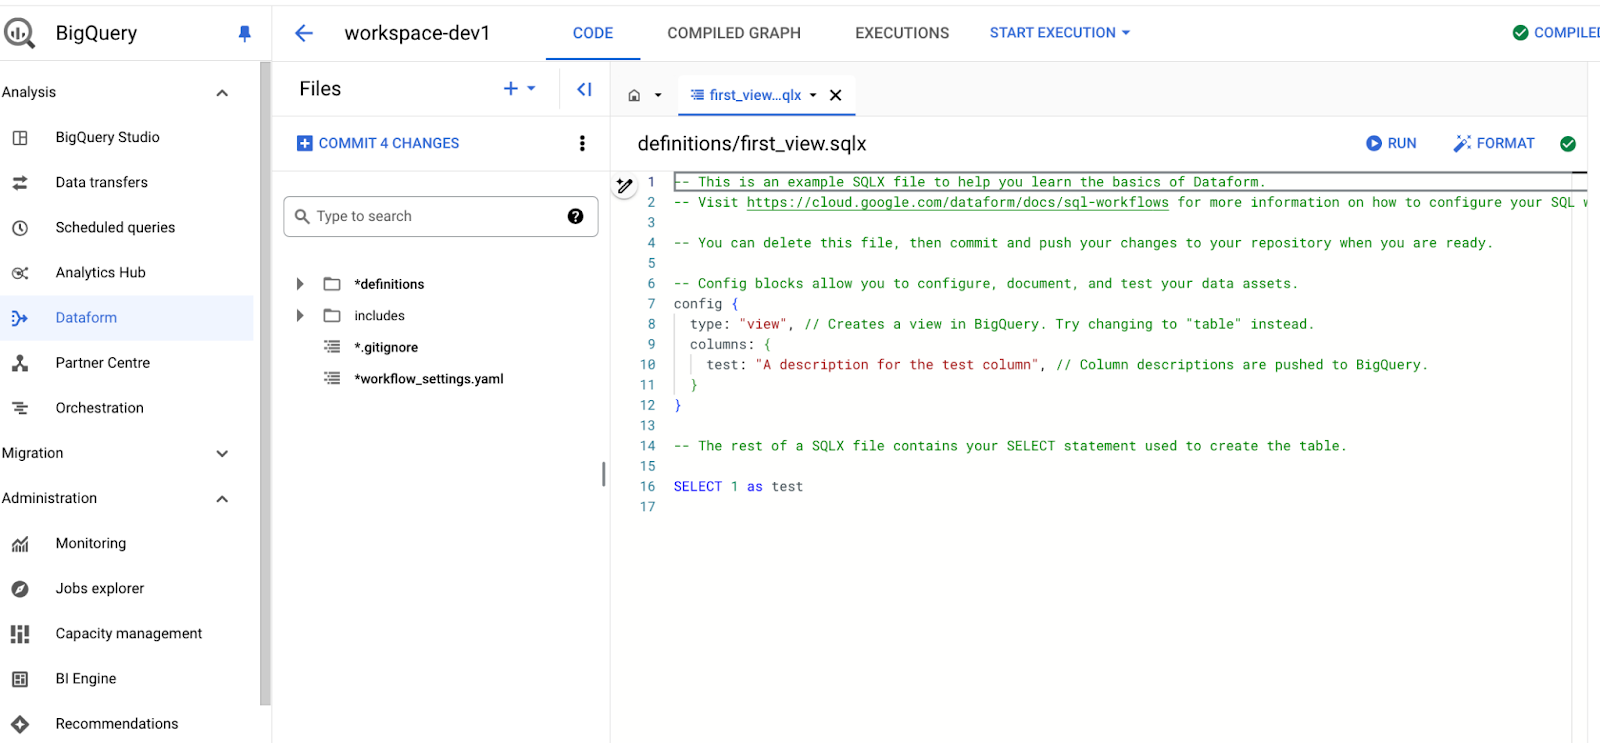
Key components of this Dataform workspace, are:
- workflow_settings.yaml file: This is the main configuration file for your Dataform project. It contains settings like the BigQuery project ID, default dataset location, and other global configurations that apply to your entire project.
- definitions folder: This is where the core of your transformation logic resides. It houses all SQLX files that define the transformations, tables, views, and declarations used in your pipeline.
As you begin to develop, you can have more files and folder structure as it suits your business requirements. But this is bare minimum. It’s crucial to organize your workspace effectively. Create directories for definitions (SQLX files), includes (common SQL functions), and tests (data quality checks). This structure helps in managing complex transformations systematically.
2.3 Declare Data Source(s):
Data sources are the raw tables or datasets that your transformations will act upon. These could be tables in BigQuery that store raw data from various systems.
Within the definitions directory → create new SQLX files that declare these data sources. For example, copy the following code in newly created SQLX file
config {
  type: "declaration",
  database: "my_project_id",
  schema: "my_dataset",
  name: "my_table_name"
}
Specify the exact location of the data source tables within your BigQuery project. This step ensures that Dataform recognizes the raw data tables as the starting point for transformations.
ref:https://cloud.google.com/dataform/docs/declare-source
2.4 Defining transformations (creating BQ tables/views):
Transformations in Dataform are SQL scripts that process and refine source / raw data into structured formats suitable for analysis. These transformations result in new tables or views in BigQuery.
Within the definitions directory → create a new SQLX file, transformed_table.sqlx. You will write the SQL logic for your transformations, that will define your very first transformation step.
For example, copy the following code in newly created SQLX file:
— transformed_table.sqlx
-- transformed_table.sqlx
config { type: "table" }

SELECT
  order_date AS date,
  order_id AS order_id,
  order_status AS order_status,
  SUM(item_count) AS item_count,
  SUM(amount) AS revenue

FROM ${ref("source_table_name")}

GROUP BY 1, 2
Use the type field in the config to specify whether the output should be a table or a view. config block you can also define other table properties for ex. partitioning, clustering, table description etc.
By default, the table / view name in BQ is the same as the SQLX file name. For example, This table will be saved as transformed_table in BQ, and can be referenced in other downstream transformation steps using the same name ex. ${ref(“transformed_table”)}
You can add more transformation steps by adding new SQLX files and defining them in these new files. Define dependencies between transformations to ensure they execute in the correct order.
ref: https://cloud.google.com/dataform/docs/define-table
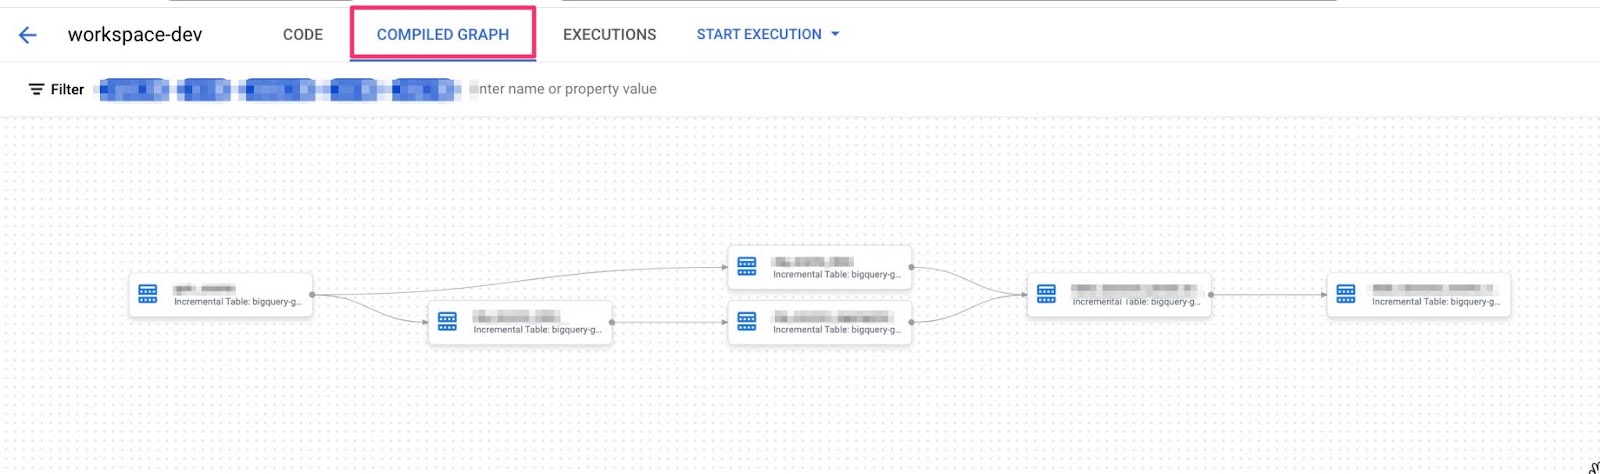
At this stage if you go to COMPILED GRAPH you can see the full lineage of your transformation steps
2.5 Executing the Transformation:
After setting up your Dataform repository, workspace, declaring your data sources, and defining your transformations, the next critical step is to execute these transformations. This process involves running the pipeline, which will process all the SQLX files you’ve created, respect the dependencies you’ve set, and generate the resulting tables or views in BigQuery.
When you execute the pipeline, Dataform reads through all the SQLX files in the definitions folder, determines the order of execution based on the dependencies you’ve defined between these files, and ensures that any transformations that rely on other tables or views are only processed once their dependencies have been successfully completed. This dependency management is crucial in complex pipelines where the order of operations can impact the accuracy and completeness of the final data.
When it comes to executing your data transformations in Dataform, you have two primary ways to choose from: manual execution and automatic execution.
This time, for the sake of simplicity, we will only discuss manual execution, primarily used in the development phase or performing one-off runs.
In real life in the production phase, however, you will mainly use automatic execution (or scheduled executions / runs) where you set a predefined interval (daily, weekly etc.) at which to regularly run the transformations pipeline. Automatic execution may be the topic of the next blog (possible via “workflow configurations”, “Workflows and Cloud Scheduler, Cloud Composer. But if you are interested, you can refer Google Cloud documentation https://cloud.google.com/dataform/docs/workflow-configurations
Dataform provides a user-friendly interface where you can manually start the execution of your transformations. This method is straightforward and doesn’t require command-line knowledge, making it accessible for team members who may be less familiar with CLI tools.
On the main dashboard (repository → workspace , locate the START EXECUTION button.
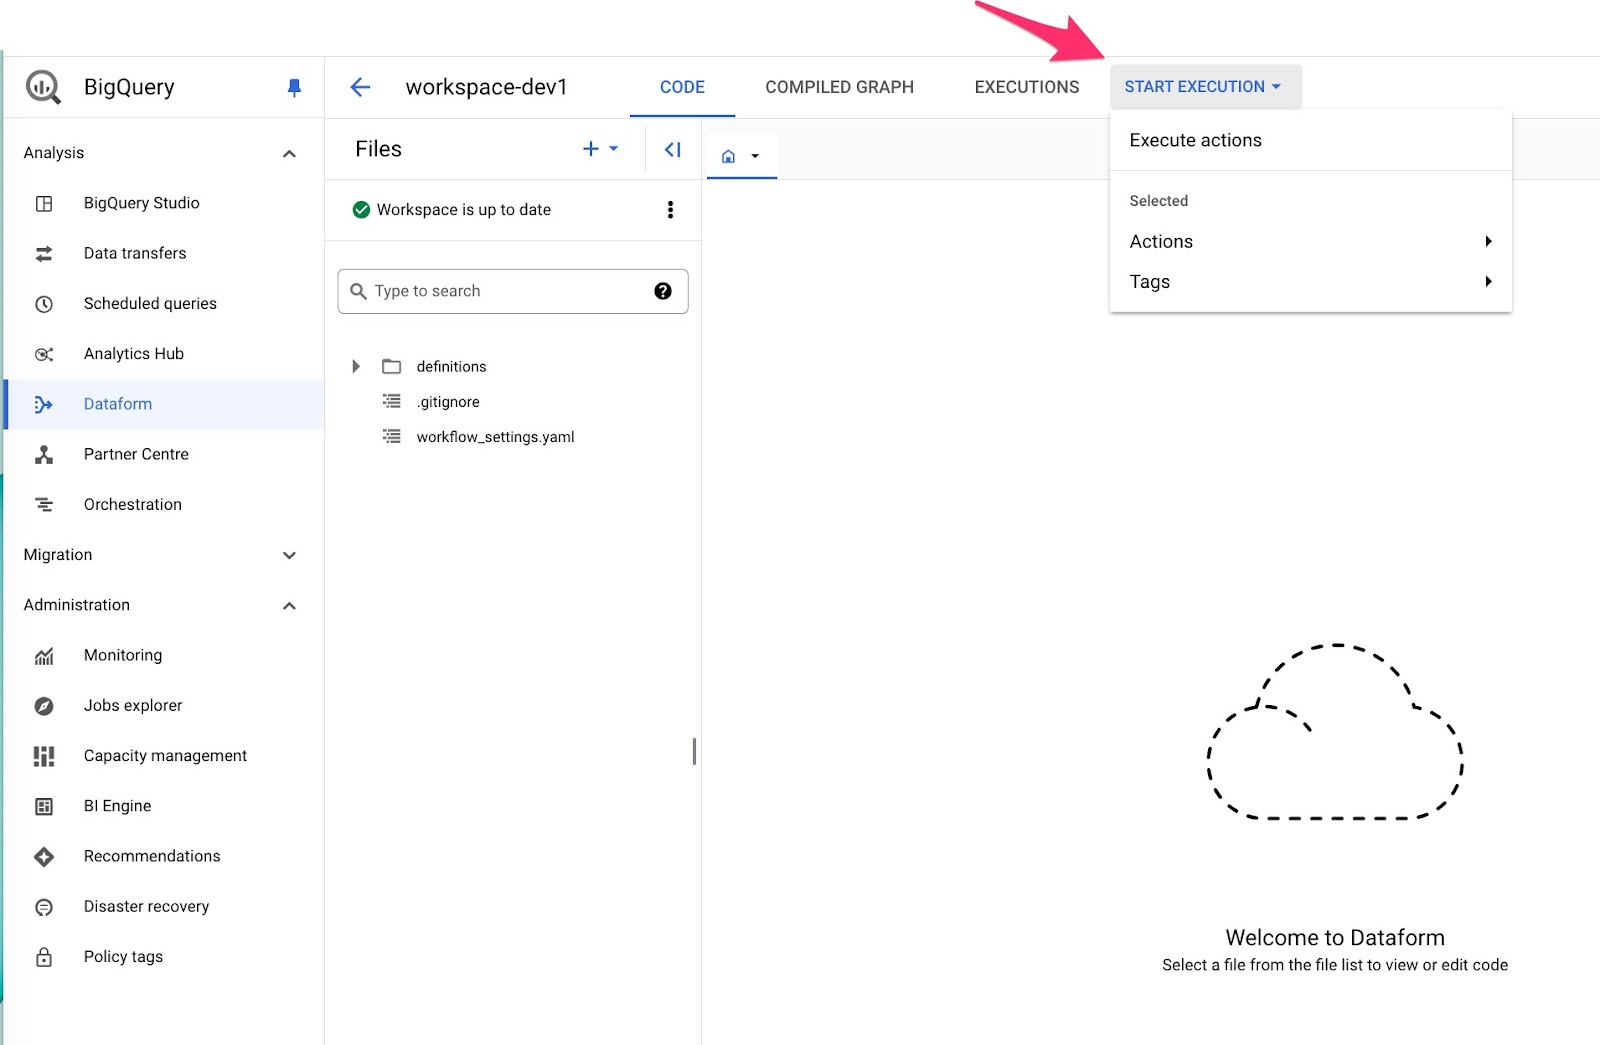
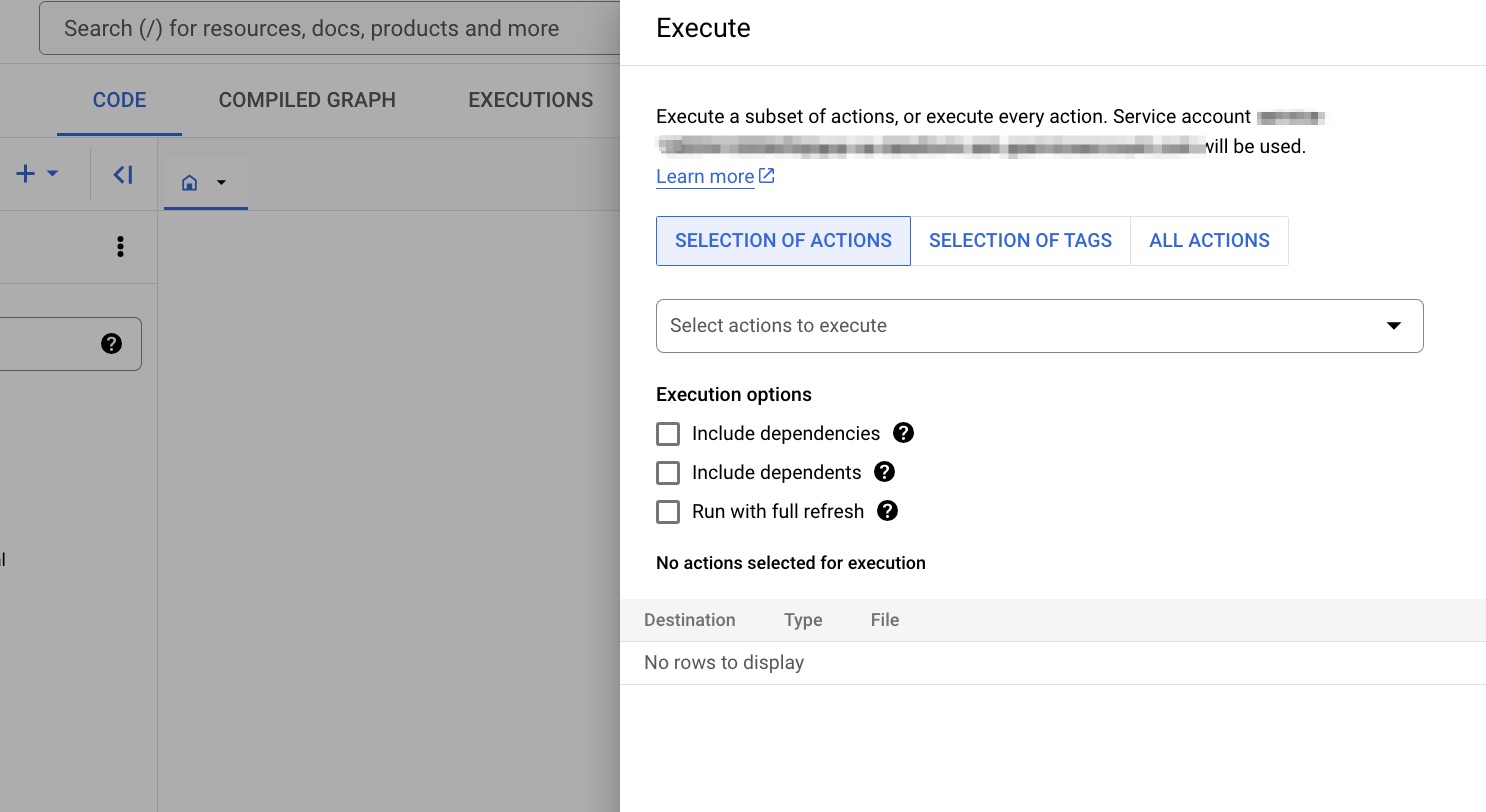
Click Execute actions and you will be presented with few options, which allows you to mainly:
- select only a subset of transformation SQLX files (actions), instead running all the transformations SQLX files. For instance, you might have changed only downstream logic, and do not necessarily need to re-run upstream transformations.
- run a full refresh of a table, or incremental run. This is a bit advanced topic for later, but for now just leave it unchecked (even if you check it, it won’t make a difference in output for our use case at the moment). This requires incremental tables to be set up. ref: https://cloud.google.com/dataform/docs/incremental-tables
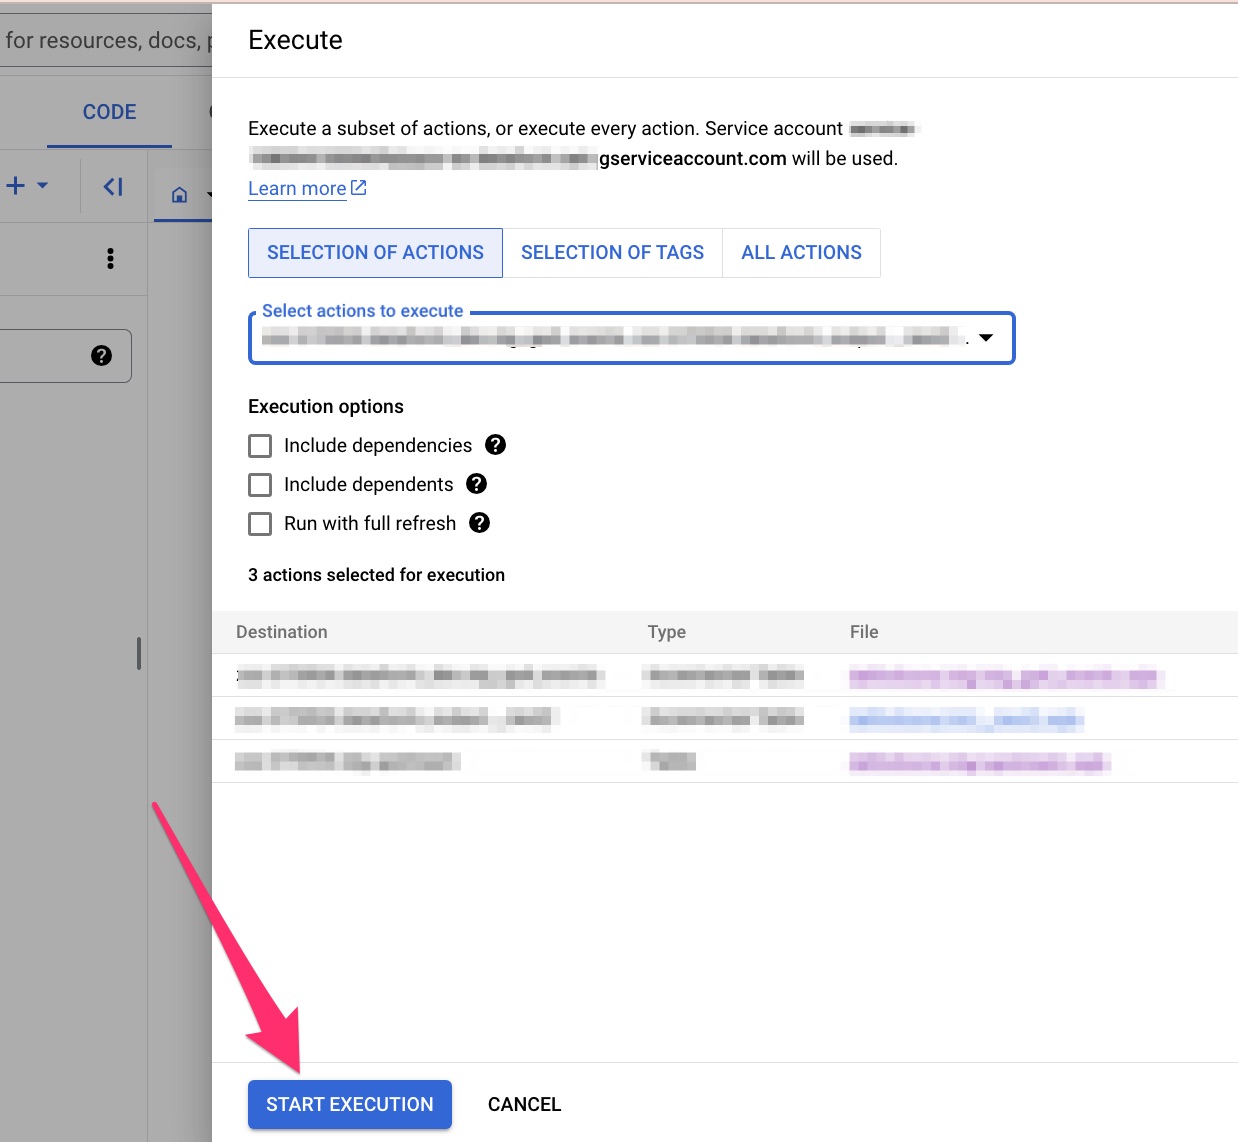
After you have made your final selections, click START EXECUTION button at the very bottom
Post-execution, it’s essential to validate that the transformations have produced the expected results. Therefore, ensure the new tables / views have been created in BigQueryand check the newly created tables or views in BigQuery for correctness and consistency.
Bear in mind, by default, Dataform will re-create a table / view from scratch on each run, unless incremental tables have been set-up. Incremental tables simply update the table with fresh data. But as i mentioned before Incremental this is a bit advanced topic for later, ref: https://cloud.google.com/dataform/docs/incremental-tables
2.6 Completion and Commit
Once you’re satisfied with the transformations, it’s time to finalize your work. This includes committing your changes to the repository and pushing them to the remote version control system
On the main dashboard (repository → workspace , locate the COMMIT 1 CHANGES link (this could be 2 changes, 3 changes etc. depending how many changes you did since last commit)
Click this link and you will be presented with this screen:.
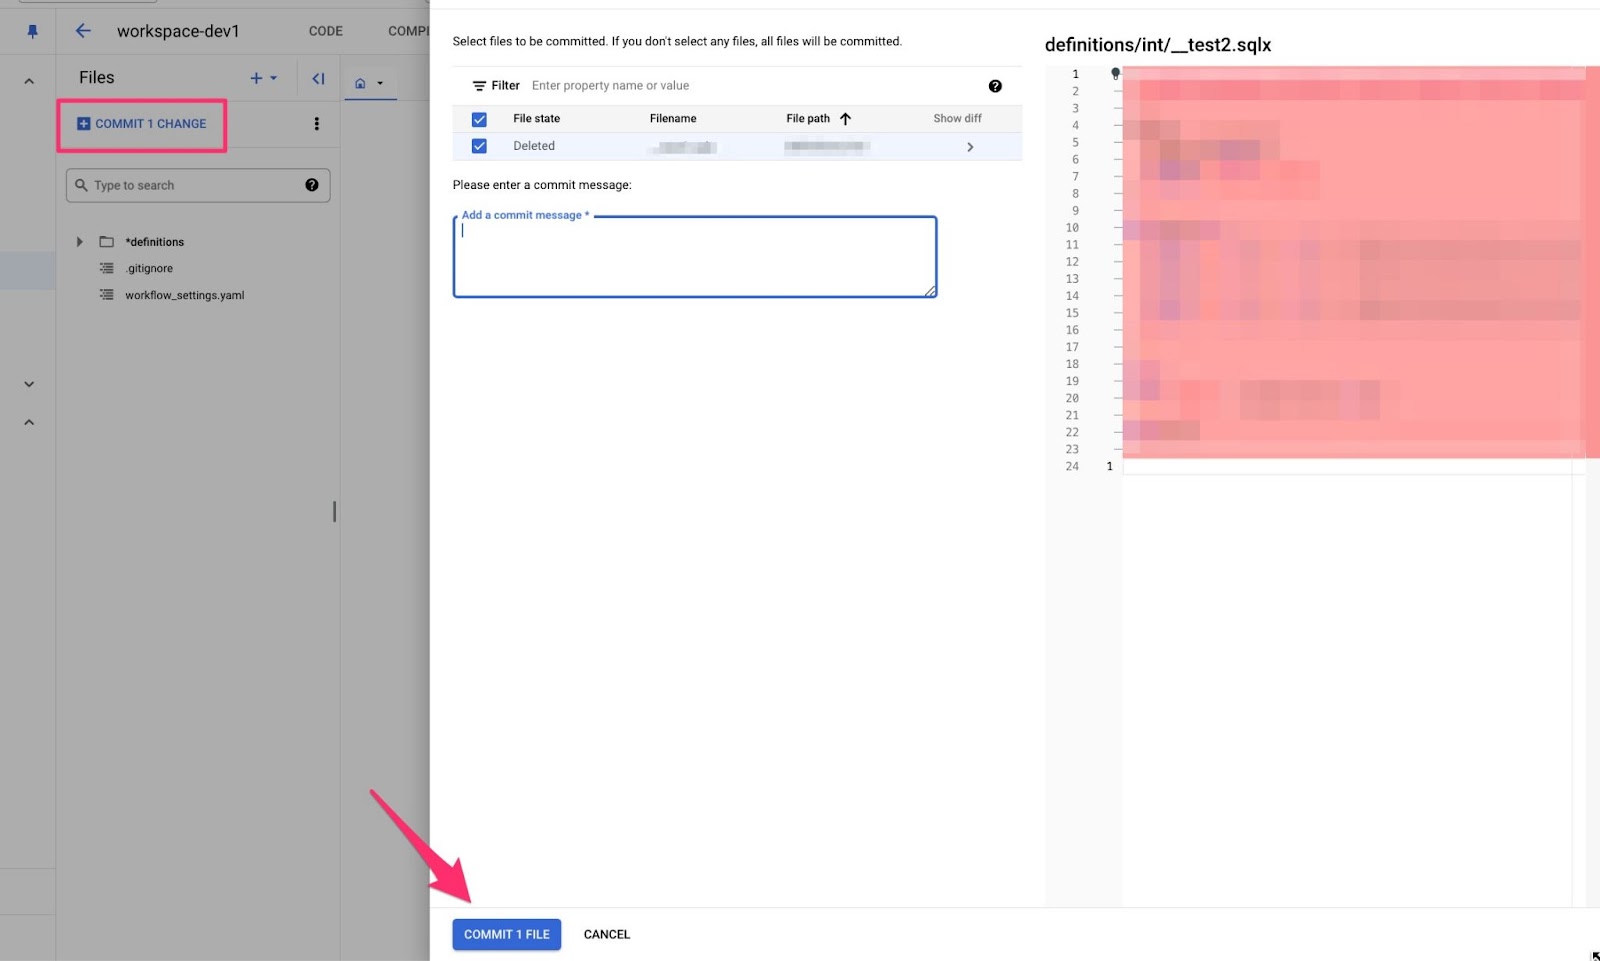
This shows you all the files that have changed since last commit and what changes you have done. Write your commit message and click COMMIT 1 FILE at the very bottom (this could be 2 files, 3 files etc. depending how many files you changed since last commit).
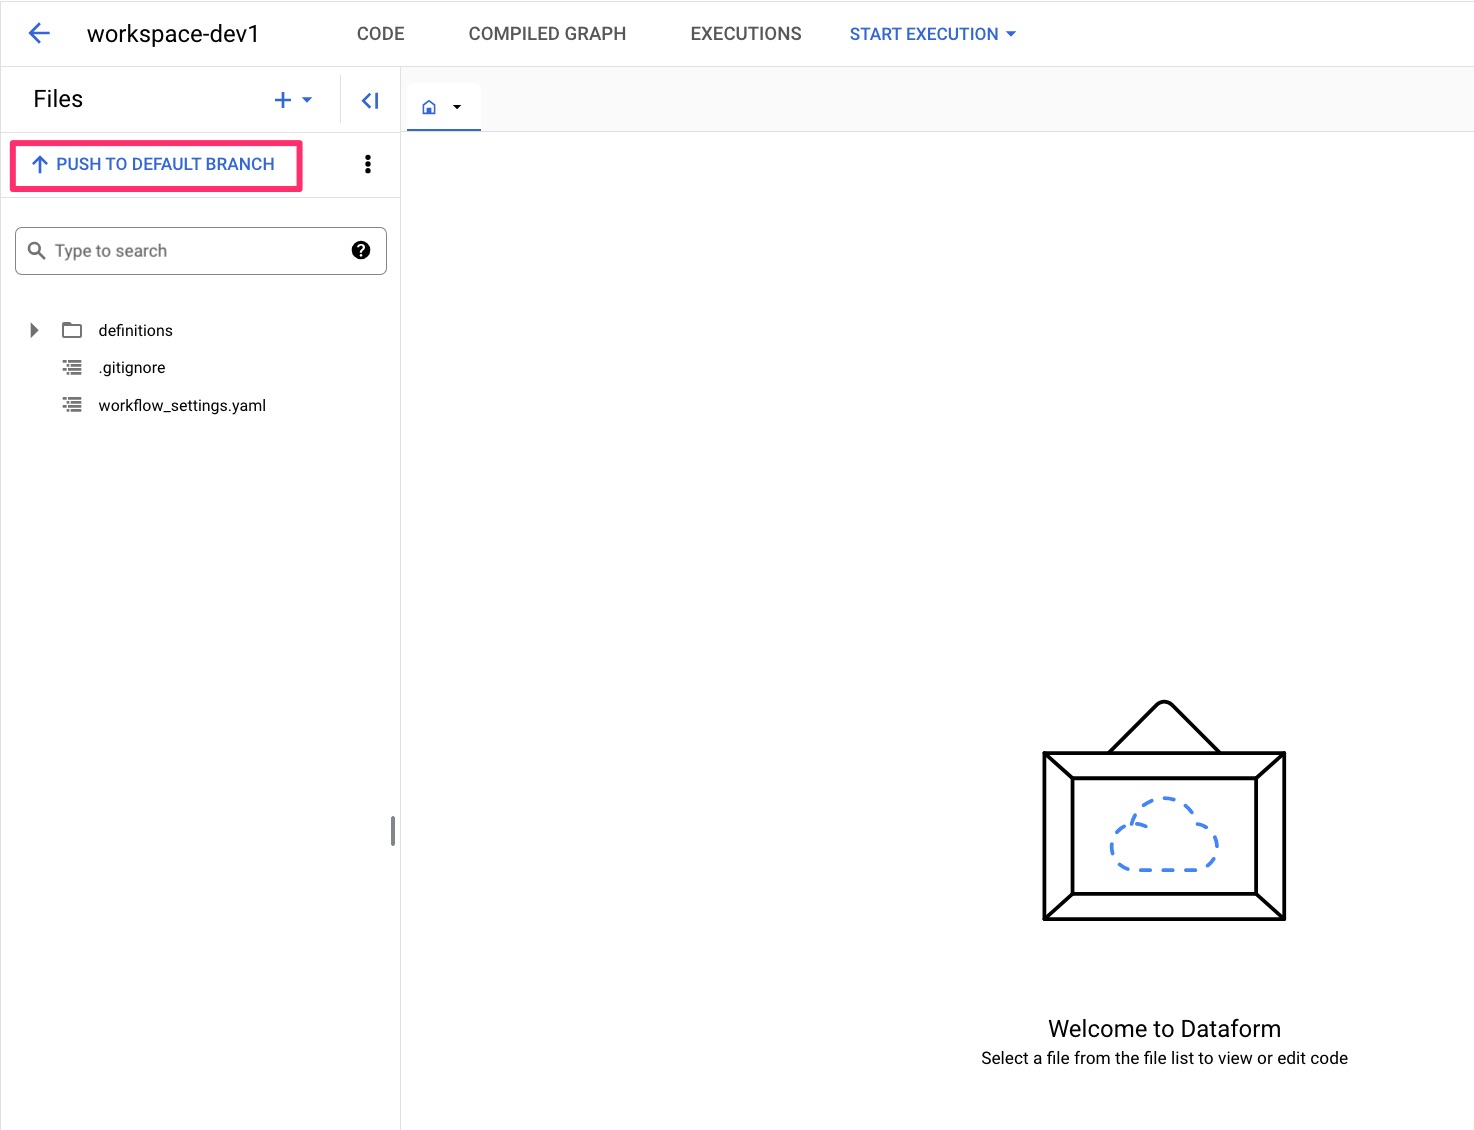
Once all is committed, click PUSH TO DEFAULT BRANCH, and your workspace will now be up to date with new changes
3. Conclusion
This step-by-step guide to setting up and implementing Dataform should provide a clear roadmap for getting started with data transformations in Google Cloud. By following these structured steps, you can efficiently build, manage, and scale your data pipelines. There are few advanced topics we could not cover – “remote git repo”, “setting up incremental tables”, “automatic execution (or scheduled executions / runs) ” – which will be needed before you fully operationalize in a production environment, but we hope to cover those topics in future.